Since I love to cook and bake, I thought I'd share some favourite recipes with you - and of course there will be a photo! Enjoy!
(Time for an update here ... when I started this page, I thought I'd carefully do the food styling and fiddle with lighting and so on. But turns out that 99% of the time, once I've cooked the meal, we'd just like to eat it while it's hot and delicious .... so, most of the photos are a grab shot on my iPhone.)
------------------------------------------------------------------------------------------------
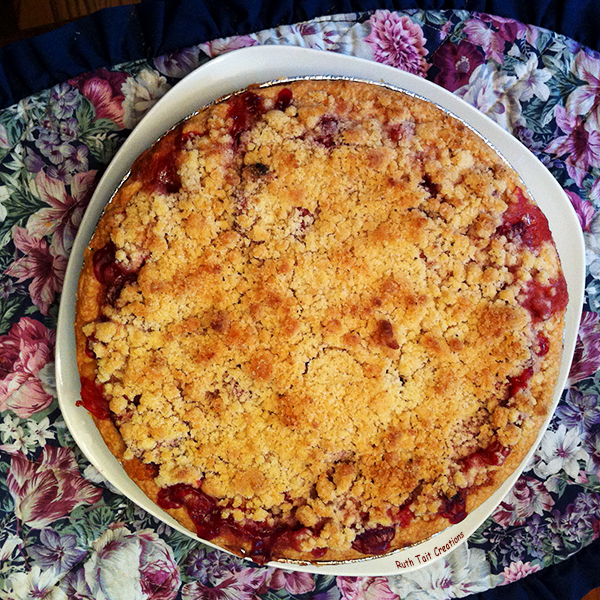
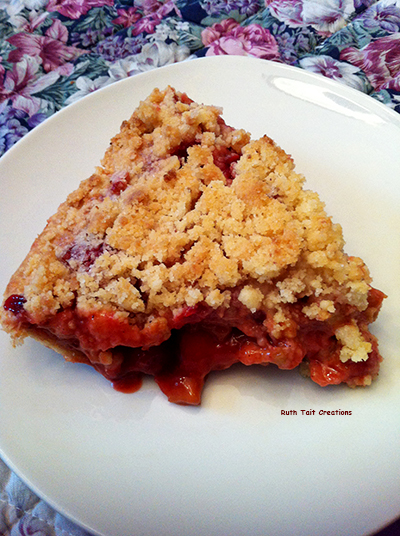
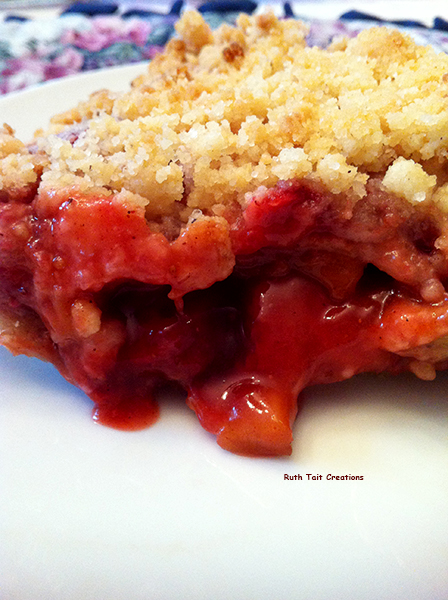
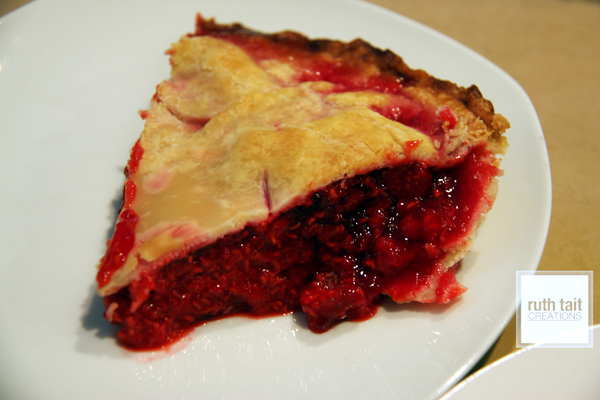
"Best in the World" Strawberry-Rhubarb Pie
INGREDIENTS:
1 uncooked pie shell - homemade or frozen (deep dish)
FILLING:
2 cups chopped rhubarb
4 cups sliced strawberries
1 cup sugar
3 tablespoons corn starch
1/2 teaspoon cinnamon
1/4 teaspoon ginger
CRUMBLE TOPPING:
2/3 cup flour
1/2 cup sugar
1/4 teaspoon nutmeg
1/4 cup melted butter
To Assemble:
Preheat oven to 400 degree F.
Prepare crust.
Filling > Combine fruit in a large bowl. In another bowl, mix dry ingredients together and then stir into prepared fruit. Pour into pie shell.
Crumble topping > Mix dry ingredients together. Slowly add melted butter, stirring together until crumbly texture (you may want to finish this with your fingers). Sprinkle/spread this over the fruit mixture.
Make sure you put this pie on a tray - it will bubble over I will not come and clean your oven!!
Bake at 400F for 20 minutes.
Lower heat to 350F and continue baking for about 40 minutes (filling should be bubbling).
Delicious slightly warm - equally good (& easier to serve) when cooled completely. ENJOY!!!
_________________________________________
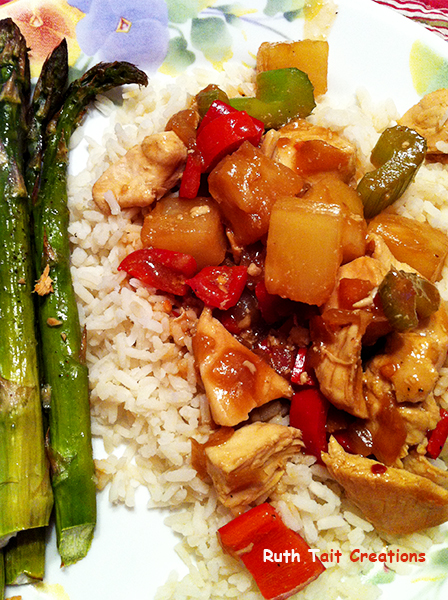
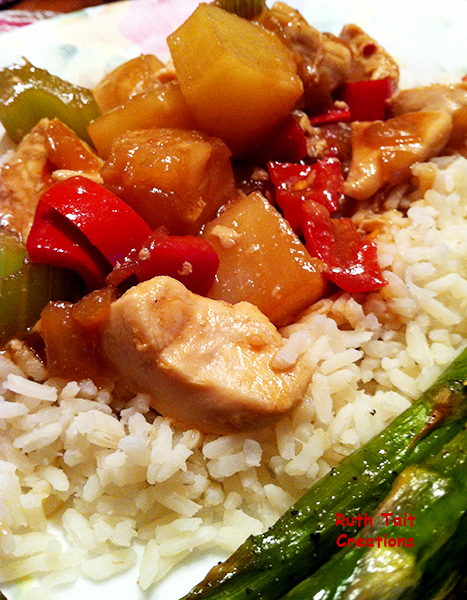
RT's Pineapple Chicken
Ingredients:
4 chicken breasts, cooked & cut into chunks
1 tbsp e.v.o.o.
1/2 cup diced onion
3 or 4 stalks of sliced celery
1 red pepper, chopped up
2 cloves of minced garlic
1 can of pineapple chunks - drain juice into a bowl
1/3 cup of water
1 tbsp sodium-reduced soy sauce
1 1/2 tsp cornstarch
1 tsp red pepper flakes
1 - 2 tsp finely chopped fresh ginger
1 tsp dijon mustard
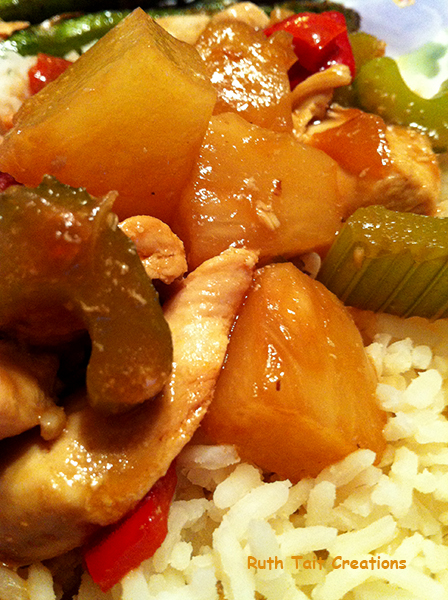
Heat olive oil in a large skillet over medium heat. Add onion, celery, & red pepper and cook stirring regularly for about 10 minutes. Add garlic & cook for another minute.
Add cooked chicken and pineapple chunks.
Mix pineapple juice & all remaining ingredients. Add sauce to skillet. Keep an eye on it, stirring regularly - bring to a boil. Reduce heat and cook for a few minutes longer to thicken sauce a bit.
Suggested serving: serve over rice with a side of asparagus or broccoli.
 _____________________________________________________________
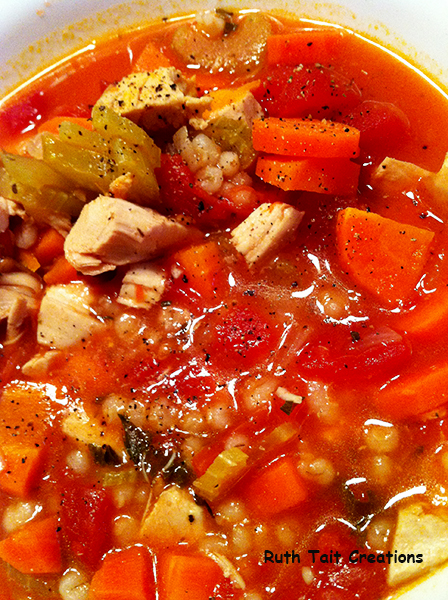
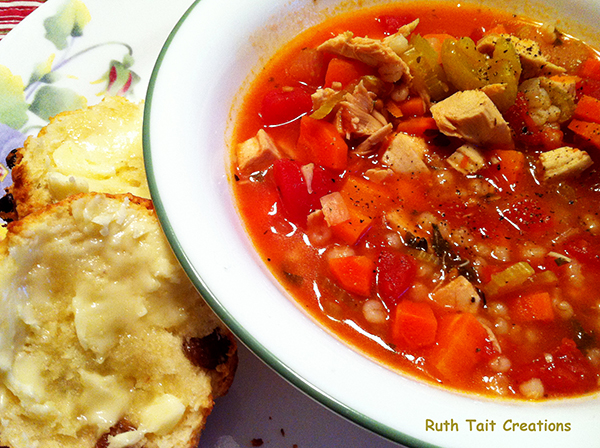
Hearty Chicken Barley Soup
Adapted ever so slightly from The LooneySpoons Collection by Janet & Greta Podleski. I'm not being compensated in any way for owning/using/mentioning the cookbook. I hope they don't mind if I share this recipe which is very similar to "Mother Souperior's Best Barley!!!
Ingredients:
1 lb (454 g) boneless, skinless chicken breast, cooked & cut into cubes
2 tsp olive oil
1 1/2 cups EACH chopped celery and peeled chopped carrots
1 cup chopped onion
1 large clove of minced garlic
1 tsp dried thyme
1 tsp oregano
4 cups reduced sodium chicken broth
1 can (28 oz/796 ml) no-salt-added diced tomatoes, undrained
1/3 cup pearl barley
1/4 cup minced fresh parsley
fresh ground pepper
Heat olive oil in a large pot over medium heat. Add celery, carrots, onions - cook and stir for about 10 minutes. Add garlic - cook for about another minute. Stir in thyme & oregano and cook another minute.
Add all remaining ingredients. Mix well. Bring soup to a boil over high heat.
Reduce heat to low.
Cover and simmer 30 to 35 minutes, until barley is tender. Serve hot with biscuits or a crispy baguette.
____________________________________________________________
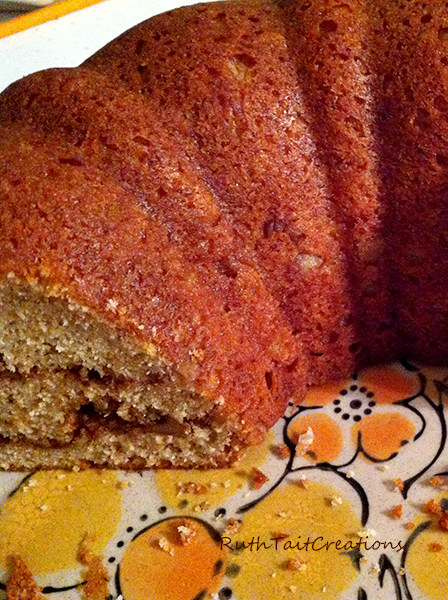
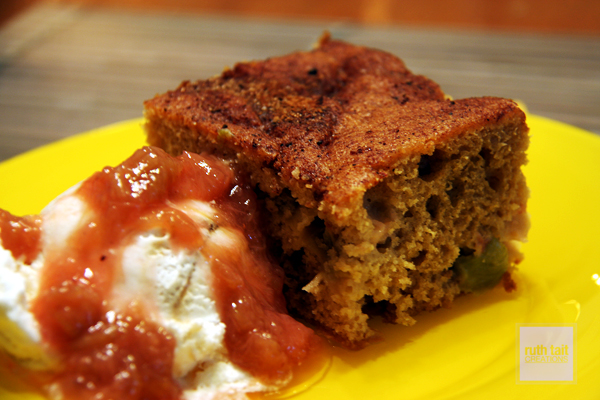
Coffee Cake
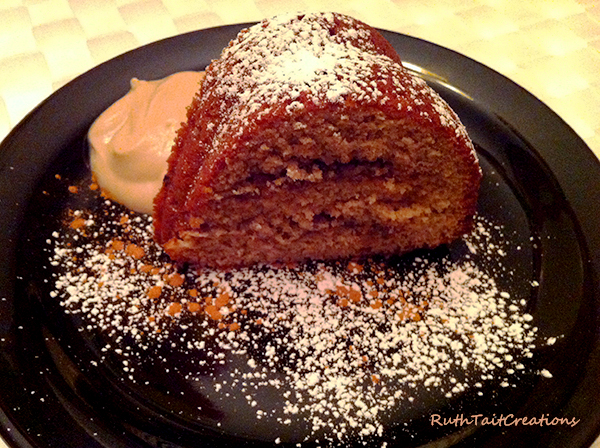
Pictured served with a dusting of icing sugar, sprinkle of cinnamon and dollop of coffee flavoured yogurt.
I was looking through an old cookbook and decided to try to "health-i-fy" the coffee cake recipe. (Apparently I also decided to start making up my own words!) It's not exactly like eating broccoli, but I've cut back a lot - next time I'll see if I can switch out more sugar for some honey or maple syrup....
Ingredients:
1/2 cup soft butter
1/4 cup mashed ripe banana
1/4 cup room temperature coconut oil
1 cup brown sugar
1/2 cup white sugar
2 eggs
1 1/2 tsp vanilla
1 cup of low fat sour cream OR 1 cup of plain greek yogurt
1 1/3 cups of whole wheat flour
2/3 cup of all purpose flour
1 tsp baking powder
Topping: 1/2 cup chopped nuts - 1st choice: pecans, 2nd best: walnuts
1/4 cup brown sugar
1 1/2 to 2 tsp cinnamon
Beat butter, banana & coconut oil with sugars. Add eggs, sour cream or yogurt, and vanilla - continue beating. In another bowl, mix the flours & baking soda. Add the flour mixture to the liquid and stir just until combined.
Make the topping by combining nuts, brown sugar & cinnamon in a small bowl.
Grease & flour a bundt pan. Put 1/3 of the batter in the bottom of the pan. Sprinkle 1/2 of topping on top. Add more batter and then the rest of the topping. Add last of batter.
Bake at 350 degrees F for 40 - 45 minutes or until toothpick comes out clean.
Cool 15 minutes then turn out onto a plate.
Thankful for ... Pumpkin Pie!

Don't forget to follow > ruthtaitphotos < on Instagram & Twitter!
I love being able to share some family favourites with you - hope you enjoy the Pumpkin Pie recipe!
Ingredients:
1 1/2 cups canned or mashed cooked pumpkin (not pumpkin pie filling!)
3/4 cup sugar
1 to 1 1/4 teaspoons cinnamon
1/2 to 1 teaspoon ginger
1/4 to 1/2 teaspoon nutmeg
1/4 to 1/2 teaspoon cloves
3 slightly beaten eggs
1 1/4 cups milk
1 6-ounce can evaporated milk (note: I've never found 6oz can so use 3/4 cup worth)
1 9" unbaked deep pastry shell
Preheat oven to 400 degrees F.
Thoroughly combine the pumpkin, sugar and spices. Blend in eggs, milk, and evaporated milk. Pour into unbaked pasty shell (have edges crimped high/use a deep pie dish - filing is generous ... or you could make 2 thinner pies, or 1 thin pie + tarts). Bake in hot oven (400degrees) for 50 minutes or until knife inserted halfway between centre and outside edge comes out clean. Cool & serve.
---------------------------------------------------------------------------------------------------------------------
Lazy Chicken Salad Sandwich
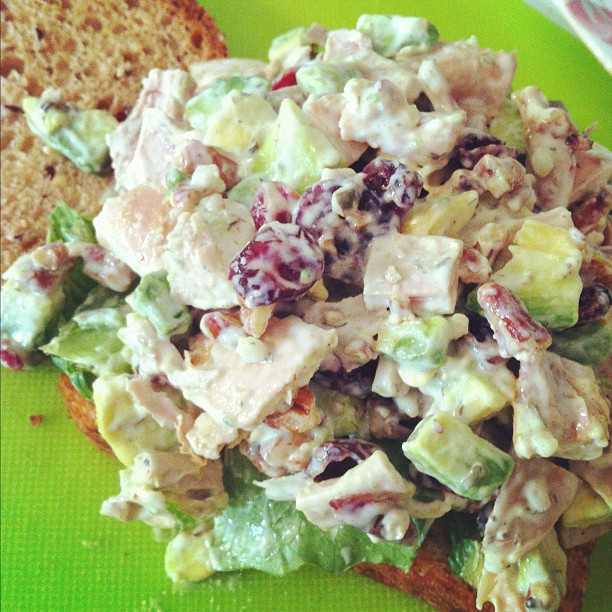
Ok so technically the sandwich isn't lazy - but I was .... there's no measurements here, you'll have to just adjust it yourself for how many sandwiches you want to make. And there's no fancy dressing ingredients needed - I was lazy there too! Read on ...
Ingredients:
Chopped, cooked chicken
Craisins - aka dried cranberries
Chopped nuts (toasted if you have time). I used pecans, but almonds, walnuts or cashews would work well
Avocado cut into small pieces
Mix together & stir in some Renee's Gourmet Cucumber & Dill Yogourt Dressing. To serve as a salad: place some lettuce on plate & add scoop of chicken salad (& maybe some additional dressing on the lettuce). For sandwich: line whole grain bread with lettuce & top with chicken salad.
Try experimenting with other combinations/additions such as: grapes, apples, dates, cucumber ....
----------------------------------------------------------------------------------------------------------------
Coleslaw

This coleslaw photo appeared on my #CloseUpChallenge on Instagram, Twitter & Facebook. Would you have known what it was? Follow me to join in the fun!!
I recently remembered a tangy coleslaw that my Mom used to make. The recipe came from a cookbook that the Lindsay Curling Club sold in the 1970's. Passing it on to the next generation....
Here's how to make it:
1 large cabbage or 2 small - shredded
3 carrots, shredded
3 onions, chopped (optional, I don't like raw onion so didn't use it at all)
Sprinkle with about 3/4 cup of white sugar. Let stand 1/2 hour.
Combine:
1/4 cup white sugar
3 Tbsp prepared mustard (I used 2 Tbsp Dijon, 1 Tbsp French's yellow)
1 cup vinegar
Bring to a rolling boil & add 1 cup salad oil. Boil another 30 seconds. Pour hot over vegetables & mix well. Cover in air tight container. Keeps crisp in fridge for up to 3 weeks.
-----------------------------------------------------------------------------------------------
Raspberry Cream Cheese Muffins
adapted from: Quinoa 365 The Everyday Superfood by Patricia Green & Carolyn Hemming

Follow ruthtaitphotos on Instagram!!
1/2 cup white or golden quinoa
1 cup water
1 1/4 cups whole wheat flour
1 1/2 tsp baking powder
1/2 tsp ground cinnamon
1/4 tsp baking soda
4 oz cold light cream cheese, diced small
1 cup fresh or frozen raspberries
3/4 cup white or cane sugar
1/4 cup vegetable oil
1 large egg
1/2 cup light sour cream
1 tsp pure vanilla extract
Bring the quinoa and water to a boil in a medium saucepan. Cover, reduce to a simmer and cook for 10 minutes. Turn off the heat and leave the covered saucepan on the burner for another 15 minutes. Fluff with a for and allow the quinoa to cool.
Preheat oven to 400F. Line a 12 cup muffin pan with paper liners. Combine the flour, baking powder, cinnamon and baking soda in a medium bowl and blend well. Add 1 1 /4 cups of the cooked quinoa and mix until it's evenly coated with the flour mixture. Stir in the cream cheese, breaking up any large pieces. The cream cheese should remain chunky in these muffins. Add the raspberries and coat in the flour mixture. Set aside.
In a large bowl, whisk together the sugar and oil, followed by the egg. Whisk in the sour cream and vanilla. Fold the flour mixture into the sugar mixture, just until combined. Don't over-mix. Spoon the dough evenly among the cups. Bake on the centre rack for 25-27 minutes, until the muffins are light brown around the edges and a toothpick inserted in the centre of a muffin comes out clean. Store in a sealed container in the refrigerator for up to 1 week.
From muffins ... now to salad ....
enjoying this recipe book AND quinoa!!!
Quinoa Chickpea Salad
adapted from: Quinoa 365 The Everyday Superfood by Patricia Green & Carolyn Hemming

Follow " ruthtaitphotos" on Instagram!
Ingredients:
2 cups (500 ml) vegetable stock
1 cup (250 ml) quinoa ...I used regular and red
one 190z (540 ml) can chickpeas, drained & rinsed
1 cup (250 ml) diced red bell pepper (about 1 pepper)
1/3 cup (80 ml) dried cranberries
1/3 cup (80 ml) chopped walnuts ... I used toasted pecans
3 tbsp (45 ml) chopped fresh parsley
Bring the stock and quinoa to a boil in a medium saucepan over high heat. Reduce to a simmer, cover and cookfor 10 minutes. Turn the heat off and leave the covered saucepan on the burner for 4 more minutes. Fluff with a fork and allow the quinoa to cool.
Transfer the quinoa to a large bowl and mix in the chickpeas, red pepper, cranberries, nuts and parsley. Chill before serving. Stays fresh in a sealed container in the refrigerator for up to 5 days.
On the 2nd day, I felt it was a bit dry/bland so I added a drizzle of olive oil & squeeze of lemon. I think you could experiment with adding some dressing like Renee's Mandarin Lime would be good, or a favorite homemade vinaigrette.
~~~~~~~~~~~~~~~~~~~~~~~~~~~~~~~~~~~~~~~~~~~~~~~~~~~~~~~~~~~~~~~~~~~~~~~~~~~~~~~~~~~
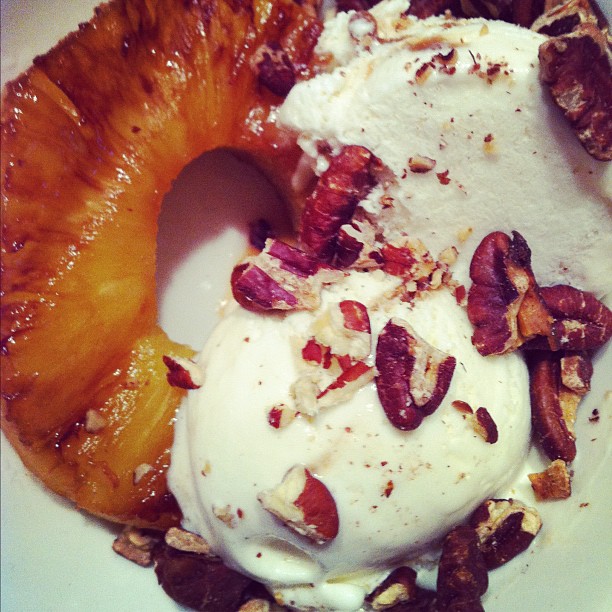
Grilled Pineapple
I made this using a George Foreman Grill, but you could use the BBQ too - just be careful of flare-up from the rum!
Join me on Instagram: ruthtaitphotos
Ingredients:
1 pineapple ring slice/person
(Dark rum - very good) NEW! Revised!! >> try Disaronno!! Even better!
Butterscotch ripple ice cream
Pecans
Instructions:
Toast pecans in 300F oven for a few minutes - they will darken up a little and have the most wonderful aroma (do not burn).
Drizzle slices with Disaronno & let marinate during dinner. Place on grill for about 3 to 5 minutes until they are warmed and have nice grill marks.
Place pineapple in bowl, top with ice cream and toasted pecans.
Yes, it is THAT easy!!
-------------------------------------------------------------------------------------------------------------
Banana Cake with Peanut Butter Icing
Adapted from Kraft foods recipe
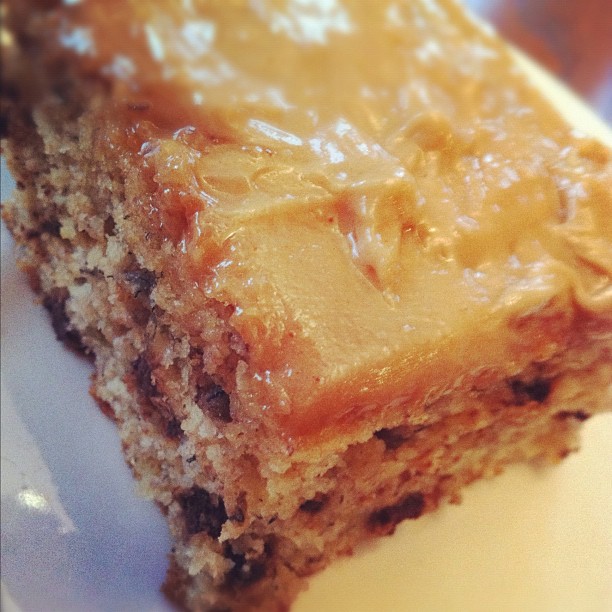
Follow ruthtaitphotos on Instagram
Ingredients:
2 eggs
1/2 cup plain yogurt
1/3 cup sugar
1/2 cup brown sugar
1 cup mashed fully ripe bananas (about 3)
1 cup unbleached flour
1/2 cup whole wheat flour
1 tsp baking powder
1/2 tsp baking soda
1/4 to 1/2 cup chocolate chips
1/3 cup Kraft Whipped Peanut Butter
1 cup icing sugar
1/4 cup milk
Instructions:
Preheat oven to 350F
Beat first 4 ingredients in large bowl with mixer until well blended. Add bananas, mix well.
in another bowl, mix flour, baking powder, & baking soda. Add to banana mixture, mix well. Stir in chocolate chips, don't over-mix. Pour into 9-inch square pan sprayed with cooking spray.
Bake 30-35 min or until toothpick inserted in centre comes out clean. Cool completely.
Beat peanut butter, icing sugar and milk with mixer until well blended; spread over cake.
---------------------------------------------------------------------------------------------------------------
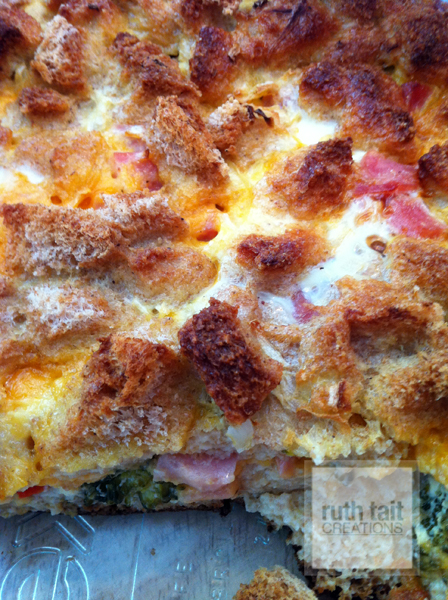
Ham and Cheese Brunch Casserole Recipe
Baking Time: 60 minutes
Ingredients:
12 slices bread, trimmed and cubed
1 1/4 cups broccoli, chopped into small pieces
1/4 to 1/2 cup finely diced red pepper
2 cups diced ham
2 cups shredded cheddar cheese
6 eggs, lightly beaten
3 cups milk
1 small onion finely chopped
1/8 teaspoon nutmeg
1/4 teaspoon Dry mustard
Instructions:
Preheat oven to 350 degrees.
Cover bottom of a buttered 9x13 inch pan with half of the bread cubes.
Layer broccoli, red pepper, ham and cheese over bread.
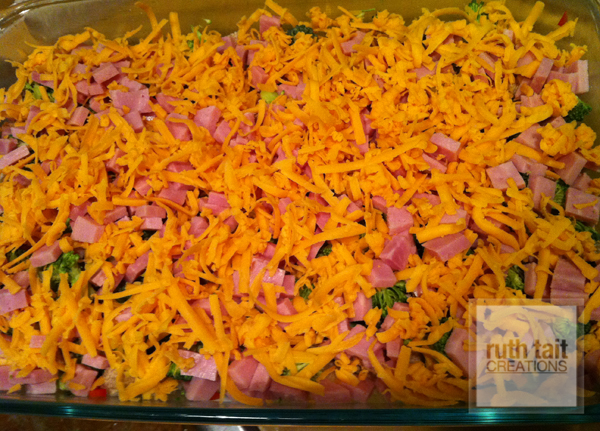
Top with remaining bread cubes.
Combine eggs, milk, salt, seasonings and pour over casserole.
Cover and refrigerate several hours or overnight.
Bake in a 350 degree oven until it tests done when a knife inserted in the center comes out clean, or 55-60 minutes.
Let stand 10 minutes and cut into squares. Makes 8-10 servings.
___________________________________________________________________
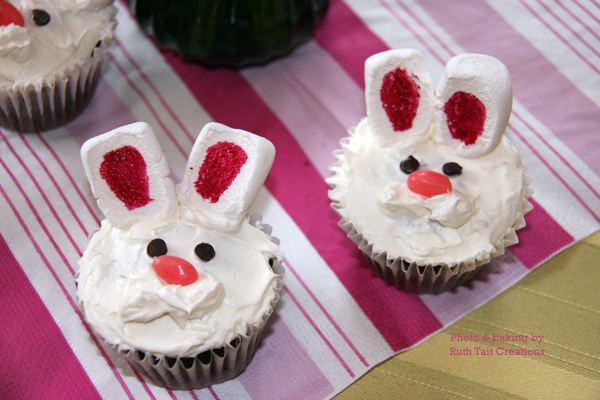
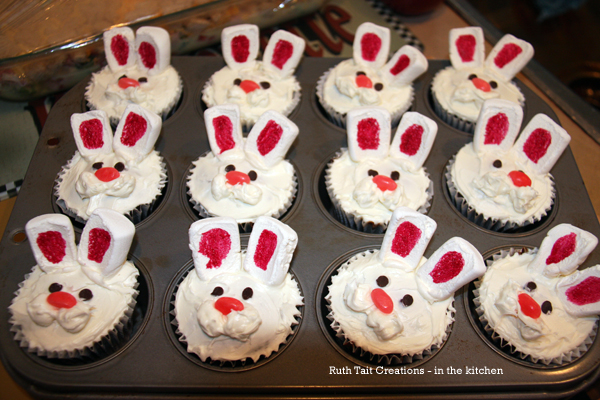
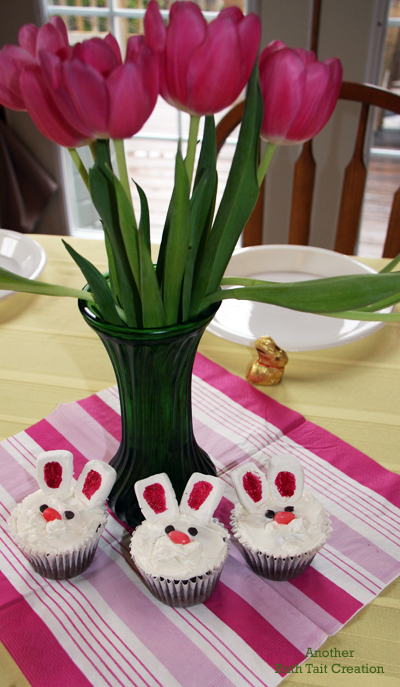
Easter Cupcake Decorating Ideas ...
Made these cute bunny cupcakes 2 years ago:
Easy! Just make your favourite cupcake (yes, mine were chocolate!), and use a white buttercream icing putting an extra little dollop of icing for bunny's cheeks/mouth. The ears were done with large size marshmallows cut in half and "painted" with red food colouring. A pink jelly bean nose, chocolate chip eyes & you're hoppin' down the bunny trail!!!
Roy's Cheeseball Creation
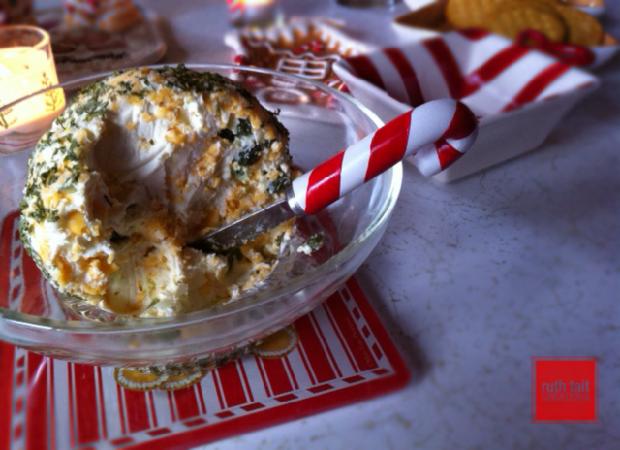
1 8oz pkg of cream cheese, softened
1/2 to 1 cup grated cheddar
1/4 cup sweet mixed pickles, chopped
1/4 cup finely chopped onion
1 chopped boiled egg
Mix together - form into ball. Sprinkle with parsley flakes.
-----------------------------------------------------------------------------------------------------------------------------------------
Ruth's Ribs
No need to BBQ in the snow! These ribs are fall-off-the-bone delicious and cooked in the oven.....
You'll need:
About 2 lbs baby back ribs
Remove clear membrane on back of ribs. (not sure what this means? Google it - there are great "How To" videos on YouTube that will teach you to grasp and remove it with a paper towel. Trust me, if I can do it - you can do it!)
Then cut each section of ribs in half (you should now have 4 pieces).
1 - 18oz bottle BBQ Sauce (I use Sweet Baby Ray's Original)
Dry Rub Mix:
1/4 cup brown sugar
1 to 1 1/2 tbsp paprika
up to 1 tbsp sea salt
up to 1 tbsp pepper (I use fresh ground mixed peppercorns)
1/2 to 1 tbsp of "Garlic Plus" seasoning
1/4 to 1/2 tsp cayenne pepper
1/4 to 1/2 tsp red pepper flakes
-----------------
Spray 4 pieces of foil with non-stick cooking spray. Place each rib portion on a piece of foil.
Cover the ribs with the dry rub mixture.
Then brush the ribs with some BBQ sauce ....

Wrap tightly and refrigerate overnight or at least 8 hours. (You'll want to put these on a tray or in a 9x13 dish just in case any juices leak from the packets).
Preheat oven to 300 degrees F.
Place the rib packets on a cookie sheet - making sure they are still wrapped tightly in the foil.
Cook for approx. 2 1/4 to 2 1/2 hours.
Enjoy....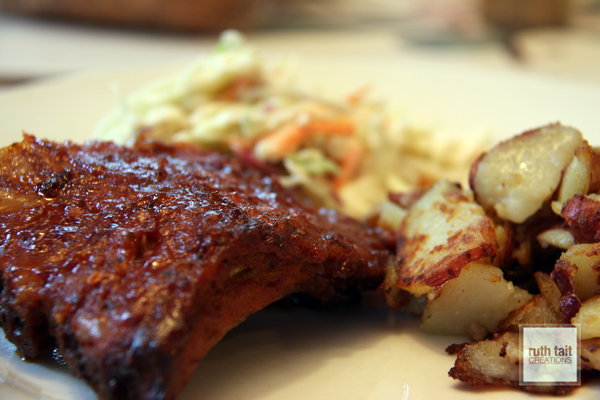
__________________________________________________________
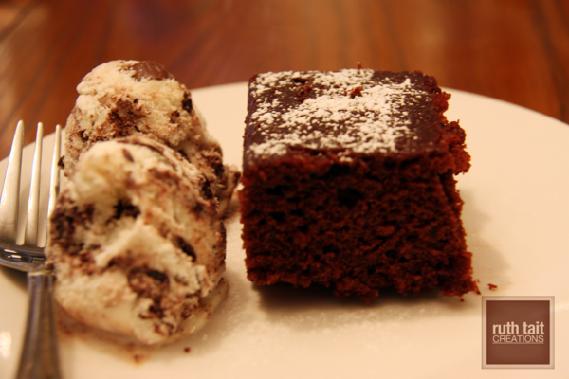
"Crazy Chocolate Cake"
Why "crazy"? Well, it's crazy-easy, instructions sound a little crazy, and it tastes crazy good.
It's simple to make - mix and bake it in the pan. You probably have the ingredients on hand. Eggless - great option if there's an allergy issue. Makes a smaller 9"x9" cake, with a denser, "brownie" texture.
Preheat oven to 350F.
Ingredients:
1 1/2 cups flour
3 tablespoons cocoa
1 teaspoon baking soda
1 cup sugar
1 tablespoon white vinegar
1 tablespoon vanilla
4 tablespoons melted butter or vegetable oil
1 cup cold water
Mix dry ingredients together in an ungreased 9x9 pan. Make three wells in the mixture. In the first well, pour vinegar, in the second, vanilla and in the third, the butter or oil.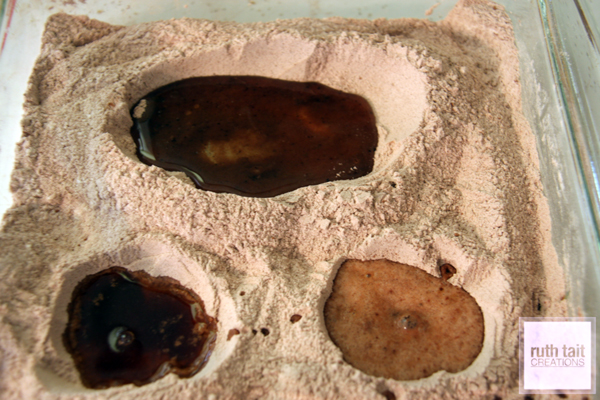 Crazy, huh?!!
Then pour cold water over the whole thing and mix together until all moistened.
Bake at 350 degrees F for 35-40 minutes or until cake tester in the centre comes out clean.
Frost with your favourite icing or just dust with icing sugar.
____________________________________________________
Raspberry-Blueberry Cake
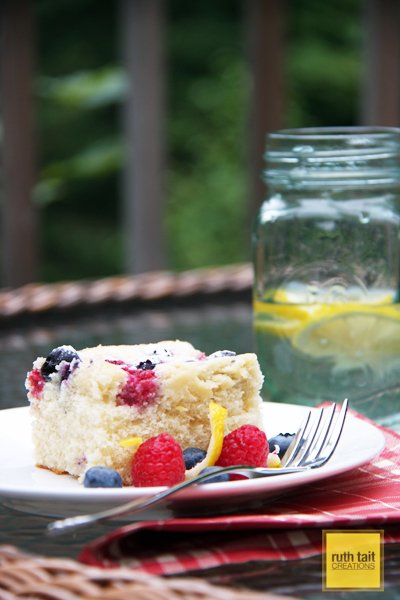
Ingredients
- 3⁄4 cup butter, softened
- 1 1⁄2 cups sugar
- 2 tsp baking powder
- 2 tsp vanilla extract
- 4 large eggs
- 2 1⁄4 cups all-purpose flour
- 1 cup milk
- Zest of 1 lemon
- 1 cup each fresh raspberries and blueberries
- Garnish: confectioners’ sugarBeat butter, sugar, baking powder and vanilla in a large bowl with mixer on high for 3 minutes or until fluffy. Add eggs, 1 at a time, beating well after each. On low speed, beat in flour in 3 additions alternately with milk in 2 additions, just until blended, scraping sides of bowl as needed. Mix in the lemon zest. Spread evenly in prepared pan. Scatter berries over top.
Bake 35 minutes or until a wooden pick inserted in center comes out clean. Cool in pan on a wire rack. If using foil, hold edges of foil and lift cake from pan - cut into squares or pieces. Dust with confectioners' sugar before serving.
Can be refrigerated covered up to 1 week.
Heat oven to 350F. Line a 13 x 9 x 2 inch baking pan with nonstick foil, letting foil extend above sides of pan, or prepare pan with PAM baking spray.
________________________________________________________________________
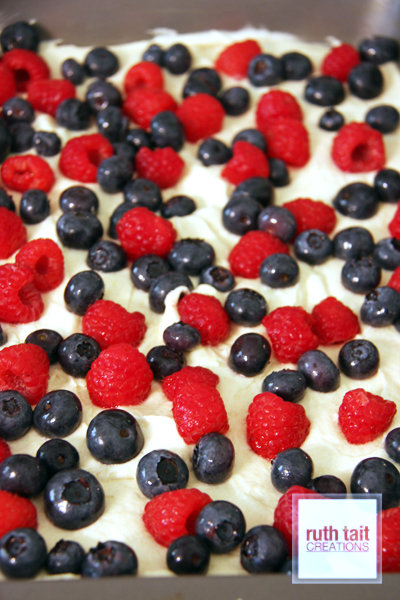
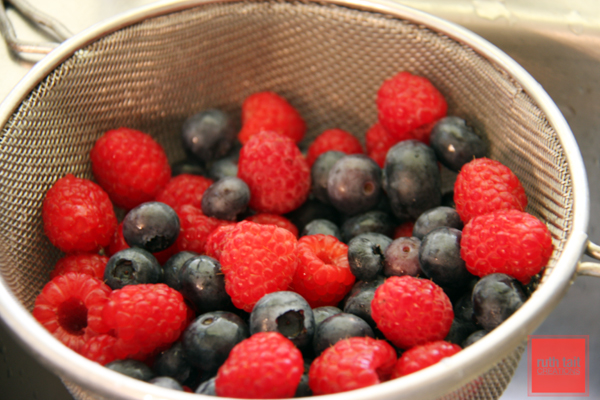
Raspberry Pie
While it may not be the most photogenic pie ever, it does taste good!
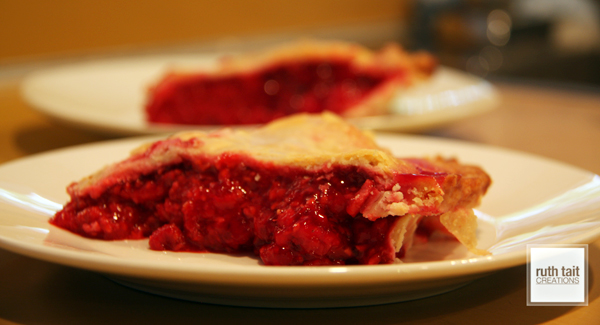
Depending on the juiciness of the berries, you may get a lot more liquid in the pie filling. I keep an old pizza pan to put under fruit pies like this one while they cook ... saves cleaning the oven when they run over the edges!
Make your own 9" crust or use a frozen deep-dish one.
You'll need:
4 cups raspberries
1 cup sugar
3 tablespoons quick-cooking tapioca
1 tablespoon lemon juice
1/4 teaspoon cinnamon
dabs of butter
Mix raspberries, sugar, tapioca, lemon juice & cinnamon until berries are well covered.
Pour into bottom shell and dot with with a few dabs of butter ....

Cover with top crust and cut slits in it. Brush lightly with milk and sprinkle with a bit of sugar.
Bake at 425 degrees F. for 15 minutes.
Reduce heat to 375 degrees F and bake for another 25-30 minutes.
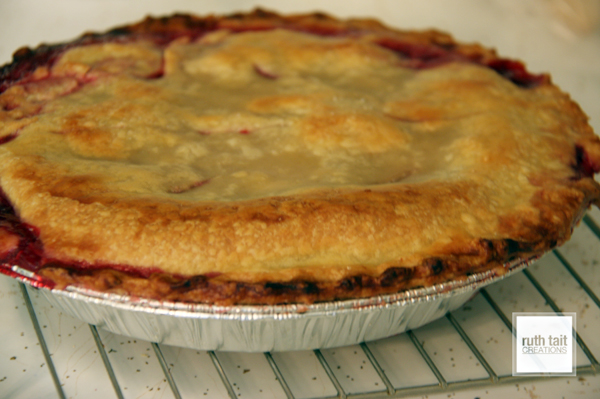
Cool and then give it a few hours in the fridge to help set the filling.
As you'll see in the last photo, there's room on the plate waiting to get the Kawartha Dairy butterscotch ripple ice cream out of the freezer! Enjoy!
--------------------------------------------------------------------------------------------------------------
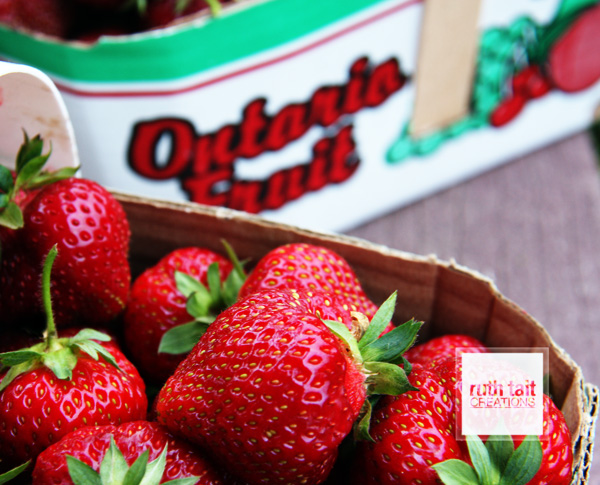
Got Rhubarb?
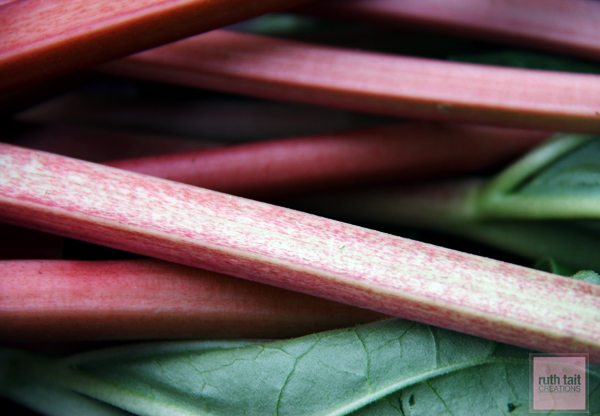
Check the Omemee Pigeon eFlyer for my recipe to make this delicious Rhubarb Cake (and some special food photography tips!)
------------------------------------------------------------------------------------------------
My Mom’s Strawberry Glaze Pie
This recipe of my Mom's was published in a fundraiser cookbook by the Ross Memorial Hospital Auxiliary. There's no date on it, but I would guess early '70s. My Dad LOVED this pie! I'm so glad to have this recipe and many good memories of lots of laughs picking strawberries.
Enjoy it now while local berries are in season. I'll bet it becomes one of your family's favourites too!
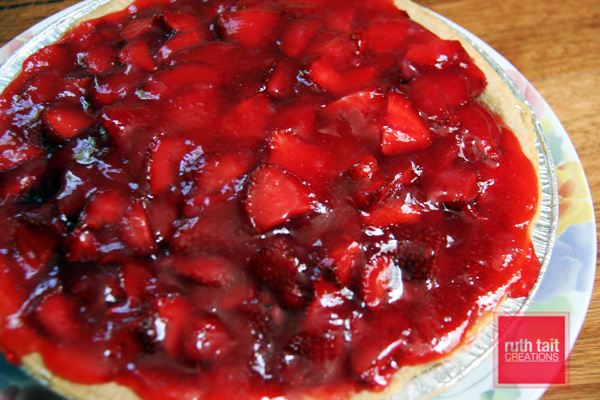
1 baked pie crust
1 cup sugar
2 tbsp cornstarch
1 cup water
3 heaping tbsp strawberry jello
1 quart cleaned, sliced strawberries (4 heaping cups – depending on pie shell)
Cook sugar, cornstarch and water until thick and clear. You can do this on the stovetop, stirring constantly … or the easy way … put into a microwave safe bowl and cook on high for 4 ½ minutes.
While still hot, stir in jello.
Let cool (but don’t let it set completely).
Put strawberries in cooked crust and pour cooled glaze mixture all over the berries.
Chill.
Serve with whipped cream or CoolWhip or vanilla ice cream.
--------------------------------------------------------------------------------------------------------------------------------------------------------------------------
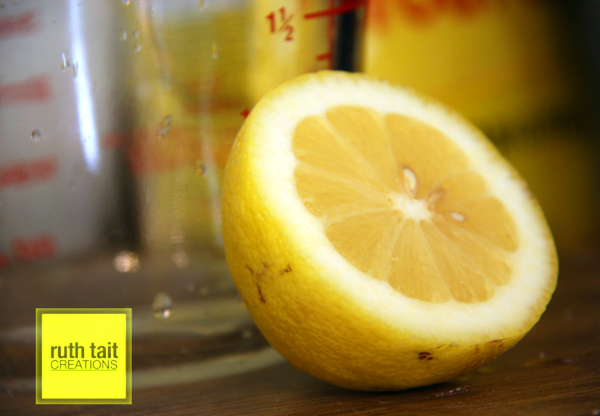
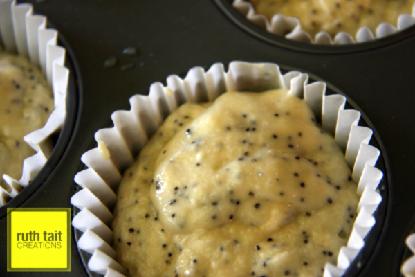
Lemon Poppy Seed Muffins
makes about 18 muffins
Preheat oven to 375F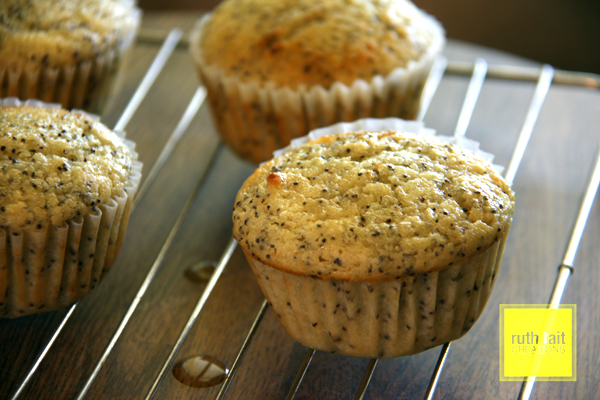
2 cups (500ml) all-purpose flour
1 tsp (5ml) each: baking powder, and baking soda
1/4 cup (60ml) poppy seeds
3/4 cup (185ml) unsalted butter, at room temperature
1 cup (250ml) granulated sugar
2 large eggs
1 cup (250ml) buttermilk
1/4 cup (60ml) applesauce (original recipe called for plain yogurt, but I didn't have any)
1/2 cup (125ml) fresh lemon juice (from 2 to 4 lemons) + finely grated zest from those lemons
Optional Glaze:
Juice of 1 lemon
1/3 cup (80ml) icing sugar
Line muffin tins with liners or butter non-stick muffin tins - about 18 muffins.
In medium mixing bowl, sift or whisk together flour, baking soda, baking powder. Stir in poppy seeds.
In large bowl, using electric mixer on medium, cream butter and sugar until fluffy. Beat in eggs one at a time, scraping down sides of bowl, until pale yellow.
In measuring cup, whisk buttermilk, applesauce, lemon juice and zest.
Add half four mixture, then half buttermilk mixture to butter mixture.
Stir with wooden spoon until just incorporated. Repeat with remaining flour and buttermilk mixtures. Don’t overmix.
Scoop 1/3 cup (80ml) batter into prepared muffin tins.
Bake in preheated 375F (190C) oven until toothpick inserted in centre comes out clean, about 15 to 20 minutes. Let stand 10 minutes, then transfer to wire rack.
For glaze, whisk together lemon juice and icing sugar. With skewer, poke several holes in top of each warm muffin. Generously drizzle glaze over muffins.
Let cool completely.
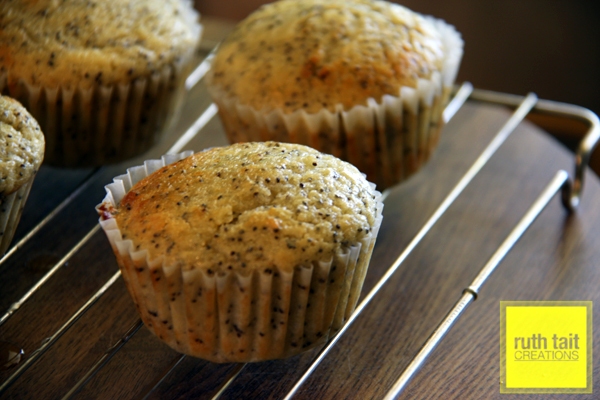
The source … May 19, 2011 Toronto Star article by Jennifer Bain, who got the recipe from Trish Magwood’s new cookbook In My Mother’s Kitchen.
Maple Walnut Tapioca Pudding
Only problem with this delicious 2 serving dessert is that there's only 2 servings! You'll want more!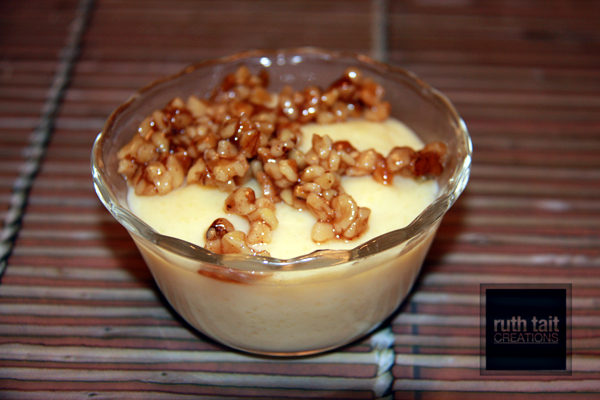
2 servings, about 2/3 cup each
Active Time: 20 minutes
Total Time: 45 minutes
Ingredients
- 1 cup low-fat milk
- 1 large egg, well beaten
- 1 tablespoon plus 1 teaspoon quick-cooking tapioca
- wee pinch of salt
- 1/4 cup plus 1 tablespoon pure maple syrup, divided
- 1/2 teaspoon vanilla extract
- 2 tablespoons chopped walnuts
- Pinch of ground cinnamon
- Pinch of ground nutmeg
Preparation
- Combine milk, egg, tapioca and salt in a medium saucepan. Let stand for 5 minutes.
- Place the saucepan over medium-low heat and cook, stirring constantly, until the mixture comes to a boil, 6 to 18 minutes (depending on your stove). Remove from the heat; stir in 1/4 cup syrup and vanilla.
- Divide the pudding between 2 ramekins or custard cups. Let cool for at least 30 minutes or refrigerate until chilled.
- Meanwhile, line a small plate with parchment or wax paper. Coat the paper with cooking spray. Combine walnuts, the remaining 1 tablespoon syrup, cinnamon and nutmeg in a small saucepan or skillet. Heat over medium-low heat, stirring, until most of the syrup has evaporated, 1 to 4 minutes. Spread the nuts out onto the prepared paper and place in the freezer until cool, about 10 minutes.
- Crumble the chilled walnut topping into pieces. Serve the pudding topped with the maple walnuts.
Tips & Notes
- Make Ahead Tip: Cover and refrigerate the pudding for up to 3 days. Prepare the walnut topping (Step 4) 15 minutes before serving.